How to Approve iPhone From a Computer or Other Device
Approve an iPhone with a trusted Apple device or phone number, understand encrypted-data passcode prompts, and recover an inaccessible account safely.
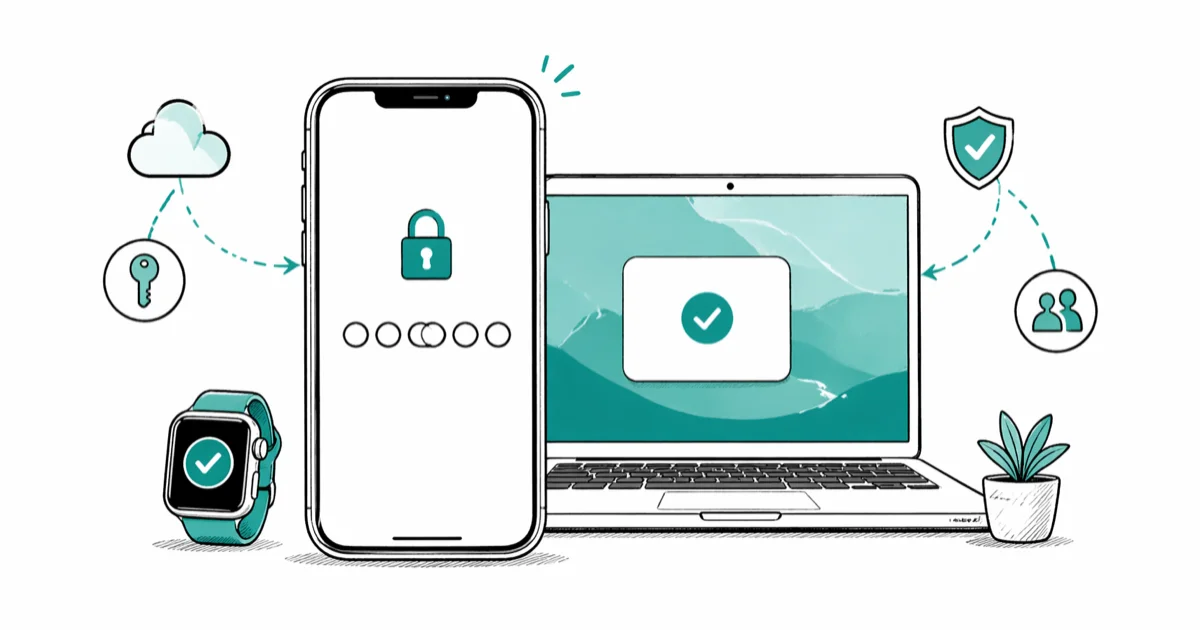
Quick AnswerEnter the six-digit code from a trusted Apple device, or tap Didn’t Get a Code? for a trusted number. If neither is available, start Apple Account recovery; do not disable Keychain or two-factor authentication.
An approval prompt can ask for a six-digit sign-in code or an older device passcode. Use the trusted device, trusted number, or recovery method shown on your own account; don’t weaken security just to dismiss the screen.
Use these steps only for your own device and Apple Account, or with the account owner’s explicit authorization. Trying to approve another person’s account without consent can violate privacy laws and service terms.
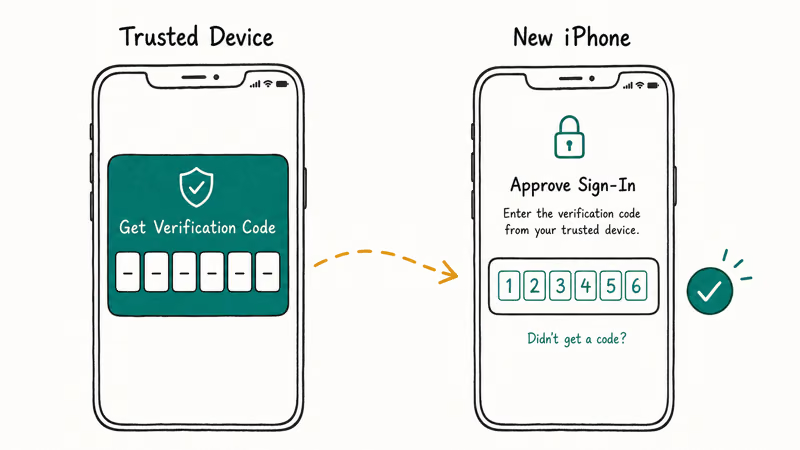
- Tap Allow on a trusted Apple device and enter the six-digit verification code on the iPhone
- If no trusted device is nearby, request a text message or phone call to a trusted number
- A separate prompt can ask for a previous device passcode to unlock end-to-end encrypted iCloud data
- If every trusted device and number is permanently unavailable, start Apple Account recovery
- Don’t turn off iCloud Keychain or two-factor authentication as an approval bypass
#1. What Can “Approve This iPhone” Mean?
According to Apple’s current two-factor authentication guide, the first sign-in on a new device or on the web requires the Apple Account password and a six-digit verification code. The code appears on a trusted device or is sent to a trusted phone number.
If you use end-to-end encrypted iCloud data, Apple may also ask for the passcode or password of one of your devices. That’s not the same as the six-digit sign-in code. Read the prompt carefully and enter only the credential it requests.
After a successful first sign-in, Apple says the device normally doesn’t ask for another verification code unless you sign out completely, erase the device, or need to change the password for security reasons. A major iOS update by itself isn’t listed as a universal trigger.
#2. Approve the Sign-In From a Trusted Apple Device
When the sign-in notification appears on a trusted iPhone, iPad, Apple Watch, or Mac:
- Confirm that the location and sign-in attempt are yours.
- Tap or click Allow.
- Enter the six-digit code shown on that trusted device into the new iPhone.
Apple’s current verification-code article confirms that the trusted device displays the code after you allow the sign-in. Never approve a notification you didn’t initiate, and never send the code to another person. The same boundary applies when troubleshooting an Apple ID verification prompt.
#3. Get a Code at a Trusted Phone Number
You don’t need a second Apple device if you can receive a text message or phone call at a trusted number.
- On the verification screen, tap Didn’t Get a Code? or Can’t get to your devices?
- Choose a trusted phone number.
- Select a text message or phone call.
- Enter the six-digit code when it arrives.
These options and labels are documented in Apple’s current sign-in guidance. Delivery depends on access to the trusted number; Apple doesn’t promise one universal arrival time. If ordinary verification texts are missing too, check the verification-code text guide before starting recovery.
Once you’re signed in, review trusted numbers at Settings > [your name] > Sign-In & Security > Two-Factor Authentication. Apple’s trusted-device and trusted-number guide states that another trusted number can help preserve access if one phone is unavailable.
#4. Handle an Old Device Passcode Prompt
Some approval screens protect end-to-end encrypted iCloud data rather than the account sign-in itself. Apple’s iCloud data security overview confirms that this data is available only on trusted devices signed in to the Apple Account and can be recovered with a device passcode or password, a recovery contact, or a recovery key, depending on the account’s setup.
Use the passcode for the device named on the screen. Don’t enter the six-digit verification code in a field asking for an iPhone or iPad passcode. If you can’t remember the requested passcode, follow the recovery choices displayed by iOS. An iCloud security-code explainer can help distinguish the prompts, but the on-screen Apple recovery choice controls.
#5. What If You Lost Every Trusted Device and Number?
Tap Didn’t Get a Code?, Can’t get to your devices?, or the equivalent option on the sign-in screen. If you permanently can’t use the trusted number shown, choose the option that says you can’t use that number and begin account recovery.
Apple’s account recovery guidance states that recovery can take days or longer and that Apple Support can’t shorten the waiting period. Because the time depends on account-specific security checks, ignore pages that promise approval in a fixed number of minutes or hours. If the account itself is disabled, use the separate Apple ID locked steps.
If a trusted phone number is still yours but the SIM or phone is unavailable, recovering access through the carrier may be faster than starting account recovery. Protect that process against SIM-swap fraud and don’t share a verification code with anyone claiming to be support.
#6. Don’t Disable Keychain or Two-Factor Authentication
Turning off iCloud Keychain doesn’t establish that a new device belongs to you. It also interrupts password and passkey syncing, so it isn’t a safe approval workaround. Likewise, an approval prompt isn’t permission to bypass Activation Lock on an account-linked device.
Turning off two-factor authentication isn’t a general fallback either. Apple’s current two-factor authentication page states that accounts created with two-factor authentication can’t remove that protection. For an account on which it was enabled recently, Apple may offer a way to lower security only during the first two weeks after enrollment. That narrow enrollment window isn’t an approval method.
#7. Check the Specific iCloud Service After Approval
First confirm that the iPhone remains signed in to the intended Apple Account and has a working internet connection. Then check the affected service under Settings > [your name] > iCloud. Photos, Drive, Contacts, Keychain, and backups have different sync controls, so use the support path for the service that’s actually missing.
Don’t sign out of the entire Apple Account based on a claim that Apple recommends it for every post-approval sync delay. If the phone remains on the setup screen, use the Updating iCloud Settings guide for that distinct symptom.
#Bottom Line
Use a trusted-device code first, then a trusted phone number. If the screen asks for an older device passcode, treat it as a separate encrypted-data check. When no trusted method remains, use account recovery; don’t bypass approval by turning off Keychain or account security.
iPhone tips & tricks
#Frequently Asked Questions
Can I approve my iPhone without another Apple device?
Yes, if you can receive a code at a trusted phone number. Tap Didn’t Get a Code? or Can’t get to your devices? on the verification screen and request a text message or call.
Can a Windows PC generate the approval code?
A Windows browser can be the place where you enter a code, but it isn’t a trusted Apple device that displays the device-approval notification. Use a trusted Apple device or a trusted phone number to receive the code.
Why is the iPhone asking for another device’s passcode?
That extra check can protect end-to-end encrypted iCloud data. Enter the passcode for the device identified on the screen, not the six-digit sign-in code.
Can I turn off two-factor authentication to stop the prompt?
Don’t rely on that. Apple says two-factor authentication can’t be removed from accounts created with it. Only some accounts that enabled it very recently may have a short option to lower security.
How long does account recovery take?
Apple doesn’t promise a fixed duration. Its current guidance says recovery might take days or longer and that contacting Apple Support can’t speed it up.
What should I do if I receive an approval prompt I didn’t initiate?
Tap Don’t Allow and review the Apple Account’s trusted devices and security information. Never give the displayed code to a caller or message sender.
How to Transfer Data to a New iPhone Without iCloud
Move everything to your new iPhone without iCloud: Quick Start device-to-device transfer, wired migration, and encrypted Finder or iTunes backups.
Best Wireless Earbuds for iPhone in 2026: USB-C Era Picks
Best wireless earbuds for iPhone in 2026, comparing AirPods Pro 3, Sony WF-1000XM6, Bose QC Ultra, and Anker Liberty 4 NC on the USB-C iPhone lineup.
iPhone Keyboard Lag? 7 Proven Fixes for iOS 26 (2026)
Fix iPhone keyboard lag with 7 proven fixes for iOS 26. Covers restart, storage, predictive text, third-party keyboards, and dictionary reset.
How to Block Porn on an iPhone: A Guide for Parents
Learn how to block porn on iPhone using Screen Time, DNS filtering, and safe browsers. Step-by-step guide for parents to protect kids' devices.